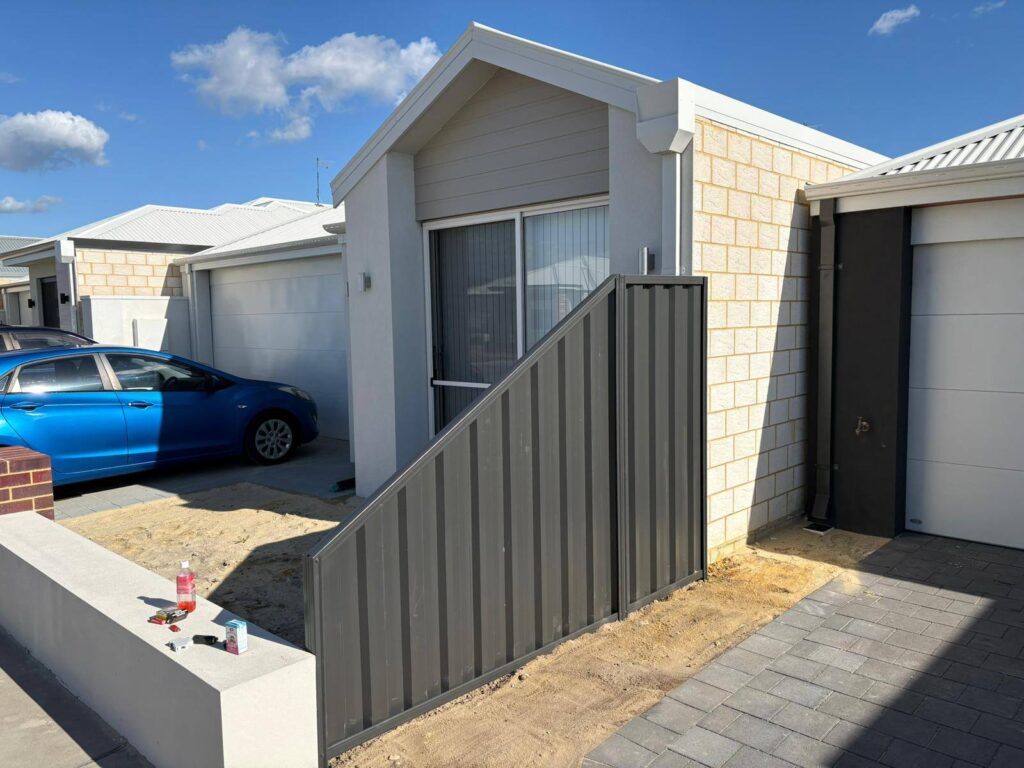
If you have never had a fence installed before the process can feel like a mystery. You get a quote a date is set and then a crew shows up with tools and materials. But what actually happens between the first phone call and the finished fence standing in your yard. Understanding the full installation process helps you know what a quality job looks like what questions to ask and where problems tend to creep in when a company cuts corners.
In short a professional fence installation in Perth typically follows several clear stages. These are an initial site assessment and quote a boundary check and material selection any required permit or neighbour notification proper site preparation the physical installation of posts and panels a final inspection and cleanup and a workmanship warranty that covers you after the crew leaves. Knowing what happens at each stage means you can spot the difference between a contractor doing the job properly and one rushing through it to move on to the next quote.
This guide walks through the entire process from the moment you first contact a fencing company through to the weeks after installation so you know exactly what a proper job involves and what to expect at every point along the way.
The Initial Enquiry and Site Assessment
Every legitimate fencing project starts with an assessment rather than a phone quote based on guesswork. When you contact a company like Fencing On A Budget a good installer will ask about the length of fencing required the type of property whether it borders a neighbour a road or open land and what the fence needs to achieve. Is it a boundary fence a pool safety barrier or a decorative front fence. These answers shape everything that follows.
A proper site visit is where the real work begins. A technician or estimator walks the property to check the ground conditions since Perth soil varies from soft sand to compacted clay depending on the suburb and this affects how deep post footings need to be set. They will look at slope across the site because uneven ground often needs stepped panels or graduated post heights rather than a flat design. They check for existing structures retaining walls trees and underground services such as power or water lines that could interfere with digging. This is also when access is assessed since a narrow side gate or a steep driveway can change how materials are brought onto site and may affect labour time.
A contractor who skips this step and offers a fixed price over the phone without ever seeing your property is one of the clearest signs of a company more interested in volume than accuracy. Ground conditions alone can shift a quote significantly once real digging begins so a proper site assessment protects both you and the installer from unpleasant surprises later. It is also the point where a good installer will ask about your priorities directly. Are you mainly focused on price durability privacy or appearance. A fence built for a rental property has different priorities to one built around a family home with young children or pets and a thoughtful installer will factor this into their recommendation rather than offering a single default option to everyone.
Boundary Confirmation and Material Selection
Before any fence goes up its exact position needs to be confirmed. For boundary fencing this usually means checking survey pegs or existing fence lines against council records. Getting this wrong is more than a minor inconvenience since a fence built even slightly over a boundary line can lead to disputes with neighbours or costly relocation later. A professional installer will either confirm the existing line is accurate or recommend a licensed survey if there is any doubt particularly on older properties where boundaries were never clearly marked.
Once the boundary is confirmed material selection comes next. This is where your budget climate and purpose all come into play. Colorbond steel remains the most requested option across Perth because it resists termites does not rot in the heat and needs almost no upkeep once installed. Timber including pinelap style fencing gives a warmer natural look at a lower upfront cost but requires more attention over time to prevent cracking and fading in Perth’s dry summers. Aluminium slat fencing is often chosen for feature fences or pool surrounds where a modern finish matters and long term durability is worth the higher price point. If the project involves a pool then material and design choices are shaped heavily by safety compliance rather than aesthetics alone which is covered in more detail below.
A good installer will walk you through these trade offs honestly rather than pushing whichever material carries the best margin. Colour selection also matters more than people expect since darker Colorbond tones absorb more heat and can expand slightly more across a hot Perth summer which experienced installers account for when spacing panels. If you want a deeper breakdown of how each material compares on cost and lifespan the Colorbond fencing guide and the pinelap fencing overview go into far more detail than a single quote conversation usually allows.
Permits Approvals and Neighbour Notification
Not every fence needs council approval but plenty do and this is a step some cheaper operators quietly skip. In Western Australia permit requirements generally depend on the fence height its location relative to the street and whether it is a pool barrier. Front boundary fences above a certain height often need approval and any new or modified pool fence requires compliance with strict safety standards before water can go anywhere near the pool.
If you are sharing the cost of a boundary fence with a neighbour under the Dividing Fences Act there is also a formal notification process that should ideally happen before work starts rather than after. This generally involves providing written notice outlining the type of fence proposed and an estimated cost so your neighbour has a fair opportunity to respond before any digging begins. Skipping this step does not just risk a disagreement over money. It can also create a legal headache later if the fence is built without proper agreement in place.
A professional installer who has done this work in your local area will usually know which council requires what and can guide you through it rather than leaving you to figure it out alone after receiving a stop work notice. If you are unsure what applies to your property your local council building department is the most reliable place to confirm requirements before signing a contract.
Preparing the Site Before Installation Day
Once a quote is accepted and any permits are sorted there is usually a preparation phase before the crew arrives with materials. If an old fence is being removed this typically happens first including disposal which should be clearly listed in your quote rather than added as a surprise charge afterward. The ground along the fence line is then marked out often with string lines and pegs to guide exact post placement.
Underground services are checked again immediately before digging begins even if they were noted during the original site visit since plans can be outdated or additional work may have occurred on the property since. This is a step worth asking about directly if a contractor has not mentioned it because digging into a power or water line is expensive dangerous and entirely avoidable with proper checks.
This is also a good time to think practically about your own property. Moving vehicles away from the work area trimming back overgrown garden beds along the fence line and letting pets stay indoors or elsewhere during the job all help the crew work efficiently and safely. A good installer will usually mention any preparation expected from you during the initial booking rather than leaving you to guess on the morning of the job.
Installation Day What Actually Happens
This is the part most people picture when they think about fence installation but there is more structure to it than simply putting up panels. Posts go in first and this is genuinely the most important part of the entire job. Holes are dug to a depth appropriate for the fence height and local soil conditions with Perth’s sandy ground often requiring deeper or wider footings than firmer clay based soils elsewhere. Posts are then set in concrete and left to cure before panels are attached. This curing time matters because rushing this step is one of the most common ways corners get cut on cheaper jobs leading to leaning or shifting posts within a year or two.
Once posts are properly set panels or infill sections go up next whether that is Colorbond sheeting timber palings aluminium slats or pool safety mesh. Spacing and alignment are checked continuously throughout this stage rather than only at the end since small errors early in a long fence run compound quickly if left uncorrected. Experienced crews will regularly check panels against a level and string line as they move along the fence rather than eyeballing the run and correcting mistakes only once the whole section is finished.
Gates are fitted last and this includes hardware such as hinges latches and for pool fencing the mandatory self closing and self latching mechanisms required under Western Australian law. Gate installation is often where the biggest quality differences show up between contractors since a gate that is even slightly out of alignment will sag or bind within months. A properly hung gate should swing freely close fully under its own weight where required and latch without needing to be forced or lifted into place.
Timeframes vary depending on fence length material and site complexity but a standard residential boundary fence of moderate length is often completed within one to three days once posts have had adequate time to cure. Larger properties more complex terrain or extensive gate work can extend this. Weather also plays a role since concrete curing and steel handling are both affected by heavy rain which is worth factoring into your expectations if your installation falls during Perth’s wetter months. A reliable contractor will communicate proactively if weather is likely to delay any stage of the job rather than leaving you wondering why the crew has not shown up.
Tools Equipment and Techniques Used
Understanding what equipment a professional crew brings can also help you judge the quality of a job. Post hole digging is usually done with a mechanical auger rather than entirely by hand particularly for longer fence runs since this ensures consistent hole depth and diameter along the entire line. Quick setting or standard concrete mixes are used depending on the soil type and how soon panels need to go on with proper crews allowing adequate time between setting posts and attaching panels regardless of how tight the schedule might be.
Levels and string lines are used continuously throughout the job rather than only at the start to keep both height and alignment consistent across the full length of the fence. For Colorbond installation specific cutting and crimping tools are used to ensure clean edges and a secure fit between sheets rather than relying on overlap alone. Pool fencing installation often involves specific tension and mesh fitting tools to meet the exacting gap and height tolerances required under Australian Standard AS 1926.1.
A crew that arrives with proper equipment rather than improvising with basic hand tools is generally a strong sign of an established and experienced operation rather than a casual or inexperienced team taking on more work than they can properly manage.
Pool Fencing Has Its Own Installation Standards
If your project involves a pool the installation process carries extra weight because this is not simply a matter of preference but of legal compliance. Under Western Australian regulations all private pools containing more than three hundred millimetres of water must have a compliant safety barrier at all times. That barrier must be at least one point two metres high and gates must close and latch automatically without needing to be manually secured. Full detail on these requirements including barrier placement and gate mechanisms is laid out in the state government’s Rules for Pools and Spas guide which is worth reviewing before finalising any pool fencing project.
A professional installer working on pool fencing should be familiar with these standards without needing to be prompted and should be able to explain exactly how your gate and barrier will meet them. Details such as the gap under the fence the climbability of horizontal rails and the exact placement of the latch release mechanism all matter and are commonly checked during compliance inspections. This is also an area where a completed installation often needs a formal compliance inspection before the pool can legally hold water so ask your contractor whether this is arranged as part of the job or left for you to organise separately with your local council.
Common Mistakes That Cause Problems Later
A number of issues tend to show up repeatedly on fences that were installed poorly and most of them trace back to the same handful of shortcuts. Posts set too shallow or in undersized concrete footings are the single biggest cause of leaning or shifting fences particularly in the sandy soils common across much of Perth. Panels attached before concrete has properly cured can shift the posts out of alignment before the footing has a chance to fully set which locks in a crooked fence line from day one.
Poor gate alignment is another common issue and often traces back to rushed hardware installation or hinges not properly reinforced into the post itself. Inconsistent panel spacing usually points to a crew working without consistent string lines or levels throughout the job rather than only checking alignment at the very end. And skipped underground service checks occasionally lead to damaged cables or pipes which is both a safety risk and an expensive problem to fix after the fact.
Knowing these common failure points gives you a much clearer picture of what to ask about and what to watch for during your own installation rather than only discovering these issues after the fact.
Final Inspection and Cleanup
A proper installation does not end the moment the last panel goes up. A thorough contractor walks the completed fence line checking that posts are plumb panels are secure gates swing and latch correctly and nothing has been left loose or unfinished. Any offcuts packaging or old fencing material removed during the job should be cleared from the site rather than left for the homeowner to deal with.
This final walkthrough is also your opportunity to raise anything that does not look right while the crew is still on site rather than discovering an issue weeks later. A company confident in its work will welcome this check rather than rush to leave before you have looked closely. It is worth taking your time here rather than feeling pressured to sign off quickly since this is genuinely your last easy opportunity to have something adjusted before the crew packs up and moves to the next job.
Warranty and What Happens After the Crew Leaves
Once installation is complete you should receive documentation covering what has been done and what is guaranteed. A genuine workmanship warranty is one of the clearest signs of a company that stands behind its work rather than one purely competing on the lowest quote. This is separate from any manufacturer warranty on materials like Colorbond steel and covers issues arising from the installation itself such as posts moving or panels coming loose.
If problems do arise later a company with a proper warranty and a fixed business presence in your area will be far easier to hold accountable than one that only exists as a listing on a quote comparison site. This is one of the biggest practical advantages of choosing a local established fencing company over the cheapest unfamiliar option that turns up in a search. In the weeks after installation it is also worth keeping an eye on how the fence settles particularly after the first significant rainfall since this is a natural point where any underlying issue with post depth or footing quality tends to reveal itself early enough to still be covered under warranty.
What Separates a Quality Installation From a Rushed One
Looking back across the entire process a few things consistently separate a fence that lasts fifteen or twenty years from one that starts showing problems within a couple of years. Post depth and proper concrete curing time are the single biggest factors since shortcuts here are invisible on installation day and expensive later. Accurate boundary confirmation prevents disputes and potential legal costs down the track. Honest material advice matched to your actual site and climate rather than whatever is easiest to install saves money over the life of the fence even if it costs slightly more upfront. Consistent use of levels and string lines throughout the job rather than only at the start keeps the entire fence line straight rather than gradually drifting over a long run. And a documented workmanship warranty gives you real recourse if something does go wrong rather than leaving you to cover repairs entirely on your own.
If you are comparing quotes for your own project these are the questions worth asking directly. How deep will posts be set and what is the curing time before panels go on. Is a site visit included before the quote is finalised. What warranty covers the workmanship separately from the materials. Has this company handled fencing on properties with similar soil conditions to yours. And who is responsible for arranging any required permits or compliance inspections. A contractor who answers these clearly and without hesitation is generally one worth trusting with the job.
Frequently Asked Questions
How long does a professional fence installation take.
A standard residential boundary fence typically takes between one and three days depending on length material and site conditions. Post curing time is a key factor since panels should not be attached until concrete footings have had adequate time to set properly which can extend the overall timeline slightly on larger jobs.
Do I need council approval to install a fence in Perth.
It depends on the fence type height and location. Front boundary fences above certain heights and all pool safety barriers generally require approval or must meet specific building regulations. Checking with your local council before work begins is the safest way to confirm what applies to your specific property.
What happens if my fence installation crosses onto my neighbour’s property.
This is exactly why boundary confirmation happens before installation begins. A professional installer will check existing survey markers or fence lines and recommend a licensed survey if there is any uncertainty since building over a boundary line can lead to disputes or forced relocation of the fence later.
Is pool fencing installation different from standard fencing.
Yes significantly. Pool safety barriers in Western Australia must meet strict legal requirements including a minimum height of one point two metres and gates that close and latch automatically. These requirements affect both the design and the installation process and are worth understanding fully before starting a pool fencing project.
What should be included in a fencing installation quote.
A proper quote should include site assessment materials labour post depth and concrete work gate hardware removal and disposal of any old fencing and details of the workmanship warranty. A quote that is a single total figure with no breakdown makes it difficult to know exactly what you are paying for.
Can I be present during the installation.
Yes and it is often a good idea particularly for the final walkthrough. Being available when posts are set and again at completion gives you the chance to confirm placement and raise any concerns while the crew is still on site rather than after the job is finished.
How soon after installation can I lean on or use the fence normally.
Concrete footings generally need time to properly cure before the fence takes any real load such as a gate being used frequently or panels being leaned on. Your installer should tell you the specific timeframe for your job but a few days of light use is a reasonable general expectation before treating the fence as fully settled.
What is the difference between a manufacturer warranty and a workmanship warranty.
A manufacturer warranty covers defects in the material itself such as a Colorbond panel corroding prematurely and is provided by the product manufacturer. A workmanship warranty is provided by the installer and covers issues caused by the installation itself such as posts moving or panels coming loose. A reputable contractor should be able to explain both clearly and provide documentation for each.
Ready to Get Started
Understanding what a proper fence installation actually involves makes it much easier to compare quotes and spot a contractor who takes the process seriously. If you are planning a new fence pool barrier or boundary replacement in Perth the team at Fencing On A Budget can walk you through a full site assessment and provide an itemised quote before any work begins.
And see exactly what a properly planned installation looks like from the first site visit through to the finished fence.